Make sure you wash and dry your flannel first, or it might shrink after you've sewn it, which can lead to puckering and potentially holes if your seam allowance was too narrow in places!
First, cut either squares or long strips of flannel. You need one fabric for the front, and one for the back. With my raggy quilts, you don't need any batting.
Then, you sew the front to the back using any stitch you want. On my squares, I simply made two diagonal lines from corner to corner, to form an "X". For my rectangles, I made a geometric pattern. You could do zig zags, etc. The idea is simply to attach the front fabric to the back.
Then, you sew together your squares and rectangles, holding the back (wrong) side together. This puts your seam (and seam allowance) on the FRONT of the quilt, as pictured in this partially-finished quilt below.

The back looks nice and clean because the seams and extra fabric (seam allowance) are on the front of the quilt.
 For the edges, I folded in the fabric and then sewed it.
Once you've got everything sewn together, you snip all those extra pieces of fabric (seam allowance), every 1/3 - 1/2 ".

 Then you stick it in the washer and dryer to make it fuzzy!
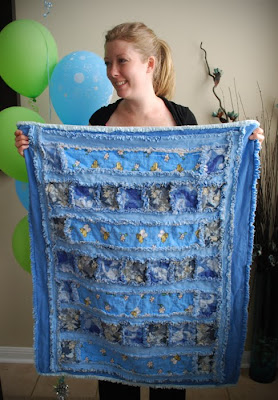
 Here is my sister Shannon with her quilt.
 The quilt continues to get fuzzier with more washes and dries, so there's no losing :)
No comments:
Post a Comment